Technology
Sub Category

To navigate to a named cell, range, or workbook element in Microsoft Excel, you can use the "Go To" function. Follow these steps:
1. Open the workbook that you want to navigate in.
2. Press the keyboard shortcut Ctrl + G (for Windows) or Command + G (for Mac) to open the "Go To" dialog box.
3. In the "Go To" dialog box, select the type of element you want to navigate to from the options at the top (e.g. "Cell", "Range", "Special", etc.).
4. If you want to navigate to a specific named cell or range, enter the name of the cell or range in the "Reference" field. If you want to navigate to a specific workbook element (such as a chart, table, or shape), select it from the list in the "Workbook" section.
5. Click "OK" to navigate to the selected element.
Alternatively, you can also navigate to a named cell or range directly from the "Name Box" in the top-left corner of the Excel window. Simply click on the drop-down arrow next to the Name Box and select the name of the cell or range you want to navigate to from the list. Excel will automatically move the active cell to the selected location.
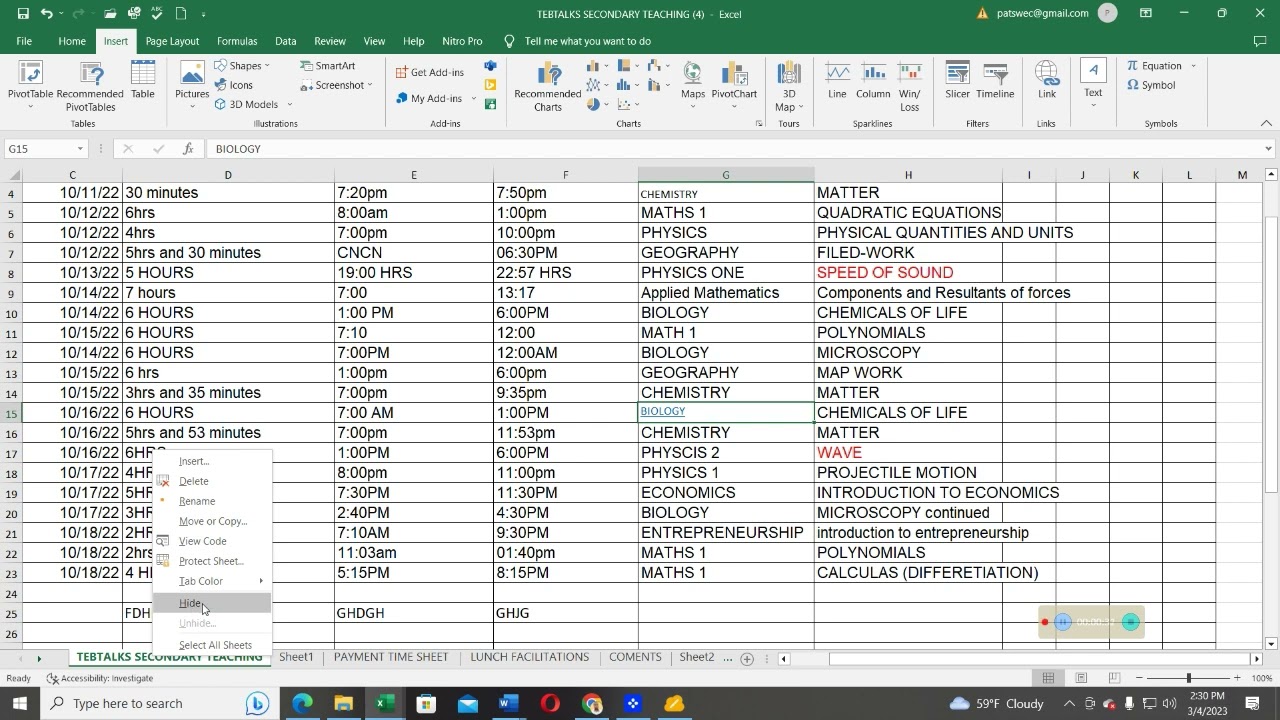
To hide a worksheet in Excel, follow these steps:
1. Right-click on the worksheet tab that you want to hide.
2. Click "Hide" from the dropdown menu.
3. The worksheet will be hidden from view, but it will still be in the workbook.
To unhide a worksheet in Excel, follow these steps:
1. Right-click on any worksheet tab.
2. Click on "Unhide" from the dropdown menu.
3. The "Unhide" dialog box will appear, showing a list of hidden worksheets.
4. Select the worksheet you want to unhide from the list.
5. Click "OK" to unhide the worksheet.
If there is only one worksheet hidden in the workbook, it will automatically be unhidden when you open the "Unhide" dialog box. If there are multiple hidden worksheets, you will need to select the one you want to unhide from the list.


To insert a hyperlink in Microsoft Excel, you can follow these steps:
1. Select the cell or text that you want to hyperlink.
2. Right-click on the selected cell or text and choose "Hyperlink" from the drop-down menu. Alternatively, you can also click on the "Insert" tab in the ribbon menu at the top of the Excel window and choose "Hyperlink" from the "Links" section.
3. In the "Insert Hyperlink" dialog box, choose the type of hyperlink you want to create (e.g. to a web page, a specific file or folder, or a location within the current workbook).
4. Depending on the type of hyperlink you are creating, you may need to enter additional information such as a URL or file path. Follow the prompts in the dialog box to complete the hyperlink creation process.
5. Click "OK" to insert the hyperlink.
To remove a hyperlink in Microsoft Excel, you can follow these steps:
1. Select the cell or text that contains the hyperlink you want to remove.
2. Right-click on the selected cell or text and choose "Remove Hyperlink" from the drop-down menu. Alternatively, you can also click on the "Insert" tab in the ribbon menu at the top of the Excel window and choose "Hyperlink" from the "Links" section.
3. Excel will remove the hyperlink and leave the text or cell formatting intact. If you want to remove the formatting as well, you can select the cell or text again and choose "Clear Formats" from the "Clear" drop-down menu in the "Home" tab of the ribbon menu. This will remove any formatting applied to the cell or text.

To change the theme of a workbook in Excel, follow these steps:
1. Open the workbook that you want to change the theme for.
2. Click on the "Page Layout" tab on the ribbon at the top of the Excel window.
3. Click on the "Themes" dropdown in the "Themes" section of the ribbon.
4. Select the theme you want to apply to the workbook from the dropdown menu.
5. The theme will be applied to the entire workbook, including all sheets and charts.
You can also create your own custom theme by selecting "Create New Theme Colors" from the "Themes" dropdown and choosing your own colors for the various elements of the theme, such as the background, text, and accents.

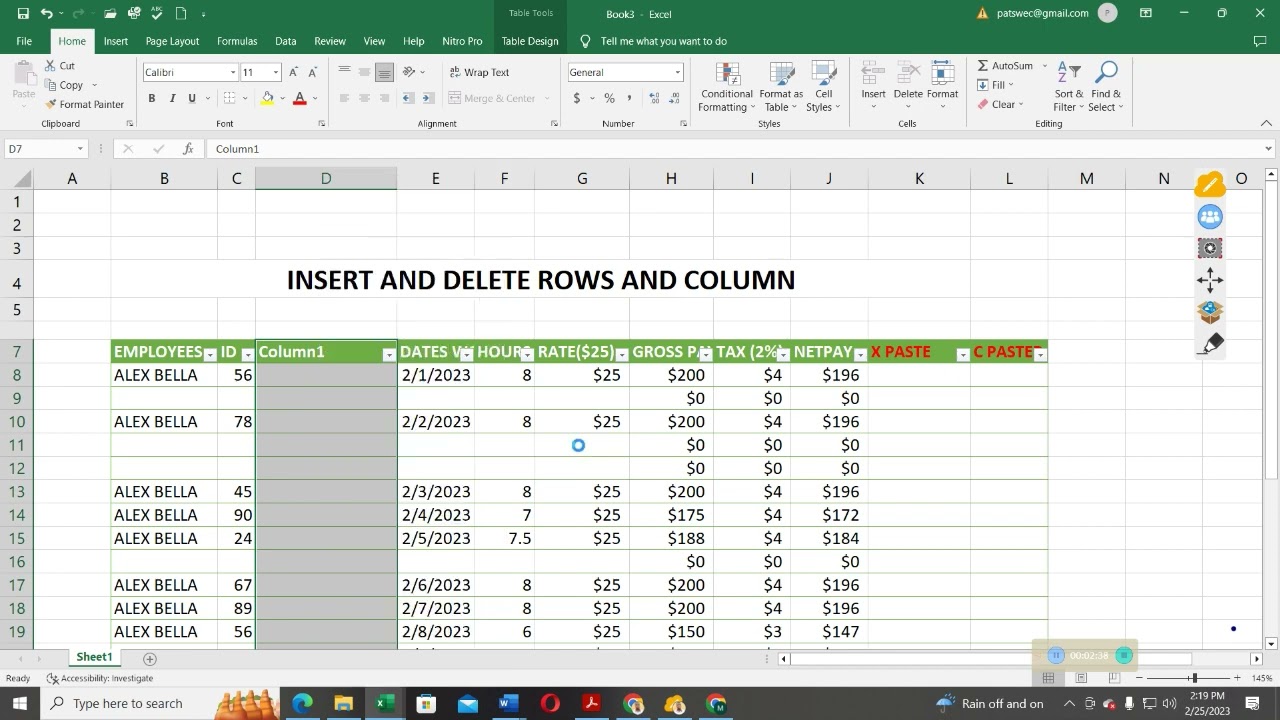
To insert a column or row in a spreadsheet, follow these steps:
1. Select the column or row next to where you want to insert the new one.
2. Right-click on the selected column or row.
3. Click "Insert" from the dropdown menu.
4. The new column or row will appear.
To delete a column or row in a spreadsheet, follow these steps:
1. Select the column or row you want to delete.
2. Right-click on the selected column or row.
3. Click "Delete" from the dropdown menu.
4. A prompt will appear asking if you want to shift the cells left or up. Choose the appropriate option and click "OK."

To change the worksheet tab color in Microsoft Excel, you can follow these steps:
1. Open the workbook in which you want to change the tab color.
2. Right-click on the tab that you want to change the color of.
3. From the context menu that appears, select "Tab Color" option.
4. A drop-down menu with various colors will appear. Select the color you want to use for the tab.
5. The tab color will change to the color you selected.
6. Click on the worksheet to exit the context menu.
Alternatively, you can change the tab color using the Excel ribbon:
1. Click on the worksheet tab you want to change the color of.
2. In the ribbon at the top of the Excel window, click on the "Home" tab.
3. In the "Styles" section of the ribbon, click on the "Cell Styles" button.
4. Select "New Cell Style" from the drop-down menu.
5. In the "New Cell Style" dialog box, enter a name for the new style.
6. Click on the "Format" button.
7. In the "Format Cells" dialog box, click on the "Fill" tab.
8. Select the color you want to use for the tab from the "Color" palette.
9. Click "OK" to close the "Format Cells" dialog box.
10. Click "OK" again to close the "New Cell Style" dialog box.
The tab color for the worksheet will now be changed to the color you selected.

In today's rapidly evolving business landscape, technology plays a critical role in maximizing business potential. Here are some tips and strategies for businesses looking to leverage technology to maximize their potential:
Invest in the right technology: It's essential to invest in technology that aligns with your business goals and objectives. This might include tools like customer relationship management (CRM) software, project management software, or online collaboration tools.
Embrace automation: Automating repetitive tasks can save time and reduce errors, allowing your team to focus on more valuable tasks. Look for opportunities to automate tasks like data entry, invoice processing, and social media posting.
Leverage data: Collecting and analyzing data can help businesses make informed decisions and identify areas for improvement. Consider implementing tools that can help you collect and analyze data, such as Google Analytics, social media analytics tools, or data visualization software.
Focus on user experience: Technology can help businesses improve the user experience for their customers. Consider investing in a user-friendly website or app, chatbots for customer service, or personalized marketing campaigns.
Train your team: Technology can only be effective if your team knows how to use it. Provide training and support to ensure your team is comfortable and confident using the technology you've invested in.
Stay up-to-date: Technology is constantly evolving, so it's important to stay up-to-date on new developments and trends. Attend conferences and webinars, read industry blogs and news sources, and network with other professionals to stay informed.
By investing in the right technology, embracing automation, leveraging data, focusing on user experience, training your team, and staying up-to-date, businesses can maximize their potential and stay competitive in today's digital age.

To insert headers and footers in Excel, follow these steps:
1. Click on the "Insert" tab on the ribbon at the top of the Excel window.
2. Click on the "Header & Footer" button in the "Text" section of the ribbon.
3. The page layout will change to the "Page Layout" view, and the "Design" tab will appear on the ribbon.
4. Click on the "Header" or "Footer" button in the "Header & Footer Elements" section of the ribbon, depending on which one you want to insert.
5. Choose the desired format from the dropdown menu, or click on "Custom Header" or "Custom Footer" to create your own.
6. In the "Header" or "Footer" text box that appears, type the text or insert the desired fields using the "Header & Footer Elements" section of the ribbon.
7. Click on the "Close Header and Footer" button in the "Close" section of the ribbon when you're finished.
8. The header or footer will now appear on all pages of the worksheet.
You can also access the header and footer options by clicking on the "Page Layout" tab on the ribbon, then clicking on the "Header" or "Footer" button in the "Page Setup" section.

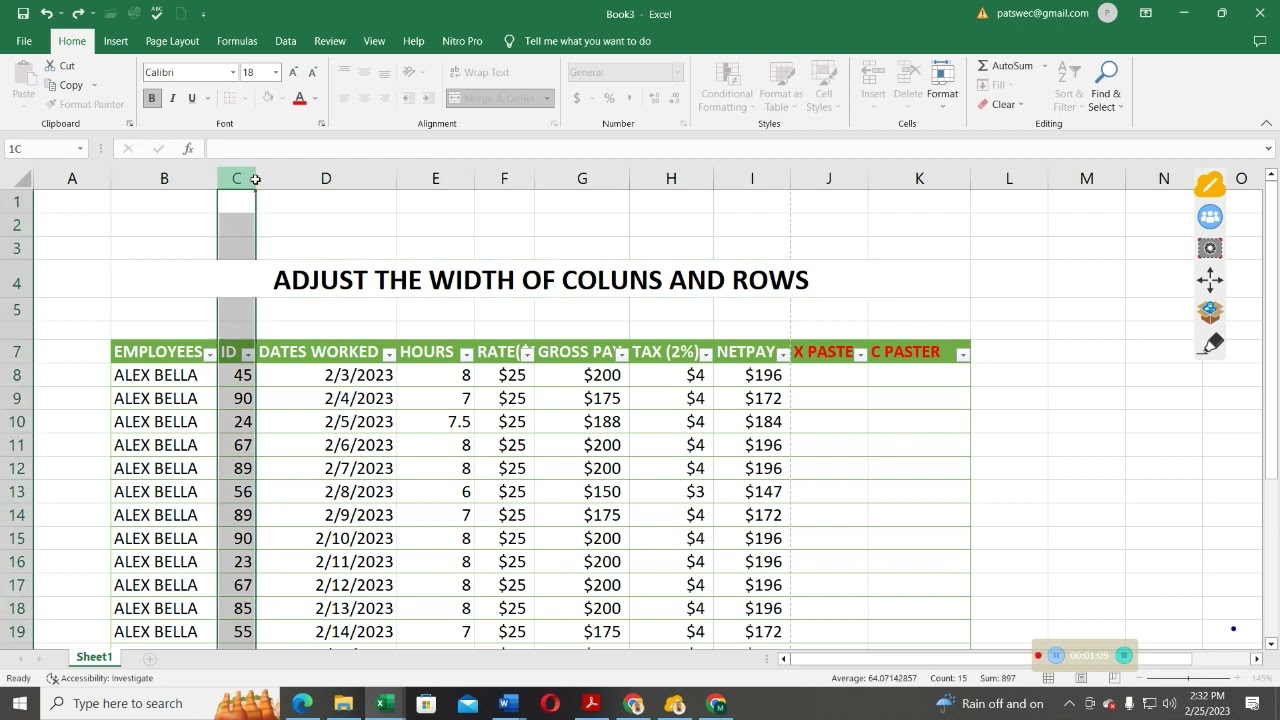
To adjust the row height or column width in Excel, follow these steps:
Adjusting row height:
1. Select the row(s) that you want to adjust the height for.
2. Right-click on the selection and choose "Row Height" from the dropdown menu.
3. In the Row Height dialog box, enter the desired height for the row in the "Row height" field.
4. Click "OK" to apply the new row height.
Alternatively, you can adjust the row height by dragging the border of the row heading until it reaches the desired height.
Adjusting column width:
1. Select the column(s) that you want to adjust the width for.
2. Right-click on the selection and choose "Column Width" from the dropdown menu.
3. In the Column Width dialog box, enter the desired width for the column in the "Column width" field.
4. Click "OK" to apply the new column width.
Alternatively, you can adjust the column width by dragging the border of the column heading until it reaches the desired width.

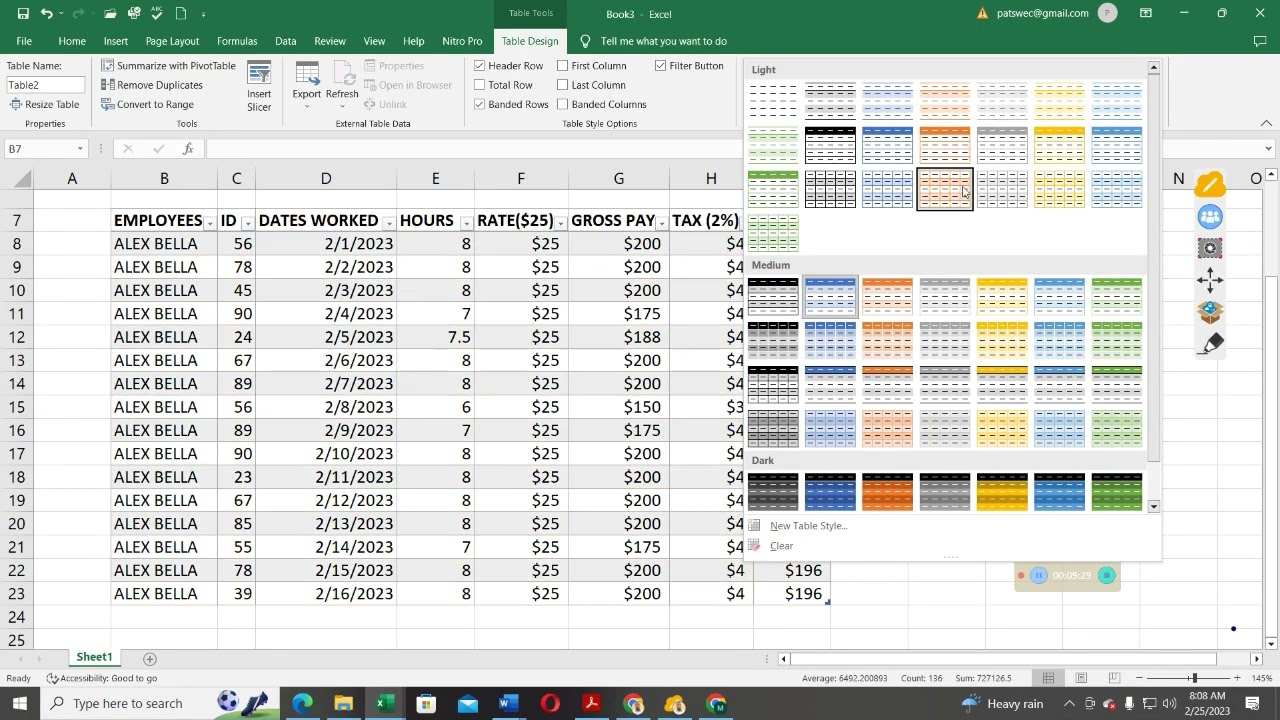
To copy or move a worksheet in Microsoft Excel, you can follow these steps:
To Copy a Worksheet:
1. Right-click on the worksheet tab that you want to copy.
2. Select "Move or Copy" from the drop-down menu.
3. In the Move or Copy dialog box, select the workbook you want to copy the worksheet to.
4. Check the "Create a copy" checkbox at the bottom of the dialog box.
5. Choose the location where you want to place the copied worksheet within the workbook.
6. Click OK to copy the worksheet.
To Move a Worksheet:
1. Click on the worksheet tab that you want to move.
2. Click and hold the mouse button on the worksheet tab and drag it to the location where you want to move it within the workbook.
3. Release the mouse button to drop the worksheet into its new location.
Alternatively, you can also use the "Move or Copy" function to move a worksheet. In this case, simply select the workbook you want to move the worksheet to, choose the location where you want to place the worksheet, and uncheck the "Create a copy" checkbox before clicking OK. This will move the worksheet to the new location within the workbook.

Modern computers have several key characteristics that distinguish them from their predecessors. Here are three important characteristics of modern computers:
Speed: Modern computers are designed to perform tasks quickly and efficiently. They typically have powerful processors that can handle multiple tasks simultaneously, allowing users to work faster and more effectively.
Memory: Modern computers have significantly more memory than older computers, allowing them to store and access more data quickly. They typically have both RAM (random-access memory) and hard disk storage, which work together to provide fast access to data.
Connectivity: Modern computers are designed to be connected to the internet and other devices. They typically have built-in Wi-Fi and Bluetooth capabilities, as well as USB and other ports for connecting peripherals like printers, cameras, and external hard drives. This connectivity enables users to access and share data easily and quickly.
In addition to these key characteristics, modern computers also often feature sleek designs, high-resolution displays, and long battery life. Overall, the characteristics of modern computers make them powerful tools for a wide range of applications, from work and productivity to entertainment and gaming.

Technology offers various benefits for students to help them excel in exams. Here are some tips, tools, and strategies that can be useful:
Digital Note-taking: With digital note-taking apps like Evernote or OneNote, students can organize their notes more efficiently and effectively. These apps can also help students recall information quickly and easily during exams.
Online Learning Platforms: Platforms like Khan Academy or Coursera offer courses that can help students gain a deeper understanding of specific topics. They can also help students practice and prepare for exams.
Educational Apps: There are many educational apps available that can help students prepare for exams, including quiz apps like Kahoot and Quizlet, as well as study apps like GoConqr and Flashcards+.
E-books and Online Resources: With e-books and online resources, students can access a wealth of information on different topics. They can also search for specific information quickly, making studying more efficient.
Time Management Apps: Apps like Trello and Todoist can help students manage their time and tasks more effectively. They can create to-do lists and reminders to help them stay on track with their studies.
Online Tutoring: Online tutoring platforms like Chegg or TutorMe offer students the opportunity to get personalized help from experts in specific subjects.
By using technology in these ways, students can improve their study habits, learn more efficiently, and ultimately excel in their exams.

In today's digital age, computer skills are essential for individuals to thrive in both personal and professional settings. Here are some of the benefits and advantages of having computer skills:
Improved Employability: Many job opportunities today require computer skills. Having these skills can make individuals more employable and can lead to better job opportunities and higher salaries.
Increased Efficiency: Computer skills allow individuals to complete tasks more efficiently and effectively. For example, using spreadsheet software like Microsoft Excel can help individuals organize and analyze data quickly and accurately.
Enhanced Communication: Computer skills allow individuals to communicate and collaborate with others more effectively. Email, instant messaging, and video conferencing tools allow individuals to communicate with colleagues and friends regardless of their location.
Access to Information: The internet provides access to a vast amount of information, and having computer skills allows individuals to access and process this information more efficiently. This can help individuals make more informed decisions in both personal and professional settings.
Improved Creativity: Computer skills allow individuals to express their creativity in various ways. For example, graphic design software like Adobe Creative Suite allows individuals to create visually appealing designs and multimedia content.
Personal Convenience: Having computer skills can also improve personal convenience. Tasks like online banking, shopping, and socializing are made easier with computer skills.
Overall, computer skills are essential in today's digital age as they offer numerous benefits and advantages that help individuals thrive in both personal and professional settings.

To create a new workbook in Microsoft Excel, you can follow these steps:
1. Open Microsoft Excel.
2. Click on the "File" tab in the top-left corner of the Excel window.
3. Select "New" from the options on the left side of the screen.
4. Choose "Blank workbook" to create a new workbook from scratch, or select one of the pre-designed templates to use as a starting point.
5. Click "Create" to create the new workbook.

This stream is created with #PRISMLiveStudio


In this video tutorial, I show you how to easily group layers in Photoshop CC. I talk about working with Photoshop layer groups, creating new groups, and much more!
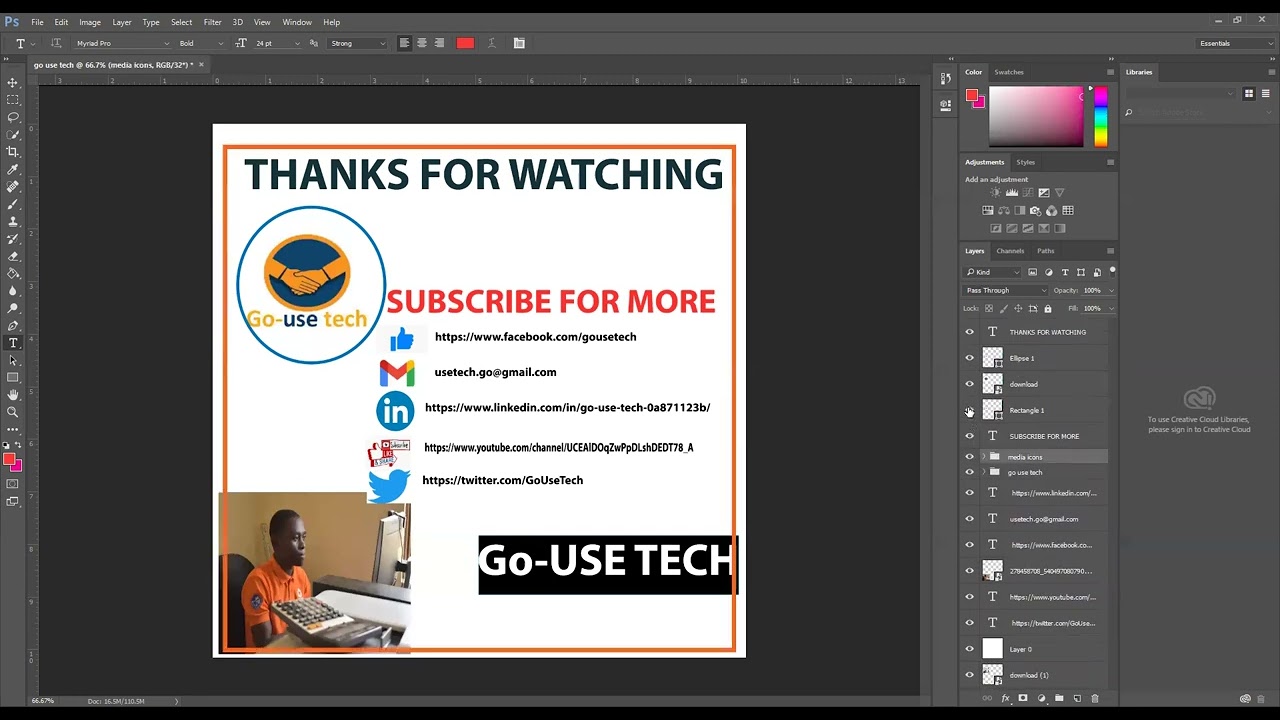
Remember to follow us via
Youtube channel: https://www.youtube.com/channe....l/UCEAlDOqZwPpDLshDE
facebook: https://www.facebook.com/gousetech
Twitter: https://twitter.com/GoUseTech
Email: usetech.go@gmail.com
linkedin: https://www.linkedin.com/in/go-use-tech-0a871123b/
whatsapp number:
+256 779 113920
Learn the fastest way to mirror an image in Photoshop to create fun symmetrical designs from any photo! This is an update to my original Mirror Image Effect video, and this time I show you an even faster and easier way to flip and mirror an image. These all new steps take only a few minutes from start to finish and work with any recent version, including Photoshop 2021 and 2022.
► Keep in touch with us in Social Media :
________________________________________
Youtube channel: https://www.youtube.com/channel/UCEAl...
facebook: https://www.facebook.com/gousetech
Twitter: https://twitter.com/GoUseTech
Email: usetech.go@gmail.com
linkedin: https://www.linkedin.com/in/go-use-te...
whatsapp number:
+256 779-113-920
► If you get for more videos stay with me & subscribe my chanel
Subscribe: https://www.youtube.com/channe....l/UCEAlDOqZwPpDLshDE

Hello Everyone,
In this tutorial, I will show you how can you design a professional Logo in Photoshop. Also, I show you how can you create an awesome photoshop Logo mockup.
I hope you will like this tutorial, so watch the tutorial carefully until the end of this tutorial.....
► Keep in touch with us in Social Media :
________________________________________
Youtube channel: https://www.youtube.com/channe....l/UCEAlDOqZwPpDLshDE
facebook: https://www.facebook.com/gousetech
Twitter: https://twitter.com/GoUseTech
Email: usetech.go@gmail.com
linkedin: https://www.linkedin.com/in/go-use-tech-0a871123b/
whatsapp number:
+256 779-113-920
► If you get for more videos stay with me & subscribe my chanel
Subscribe: https://www.youtube.com/channe....l/UCEAlDOqZwPpDLshDE

Hi Everyone,
In this tutorial, I have explained about design Modern business cards, Graphic Design in Photoshop.
to communicate to use Email us at usetech.go@gmail.com
Want more? Check out my Photoshop crash course for beginners:
https://www.youtube.com/channe....l/UCEAlDOqZwPpDLshDE
in this video we take a look at EVERY toolbar tool in Adobe Photoshop CC.
would you like to get in touch with us on mail please send us a text at usetech.go@gmail.com
Get Adobe Creative Cloud: https://bit.ly/AdobeCCSub
Where I get music for all of my videos: https://bit.ly/Artlist2ExtraMonths
Amazing stock footage: https://bit.ly/Artgrid2ExtraMonths

Welcome to Learn Everything about Adobe Premiere Pro. In this massive 9+ hour free master class course you will learn EVERYTHING about Adobe Premiere Pro, starting with the absolute basics and building up to the most advanced features available to use in Adobe Premiere Pro. So without further ado lets waste no time and get into Learn EVERYTHING about Premiere Pro.

New #AdobePremierePro tutorial on how to link layers and group video clips.
These tricks are so awaresome

Hello friends this video clearly shows you how easily you can set up your kobo tool box on your smart phone and start collecting data
for more details kindly email us
usetech.go@gmail.com
Take attention to use the correct server:
https://kc.humanitarianresponse.info
https://kc.kobotoolbox.org

KoBoToolbox is a free and open source platform to collect data, developed by field researchers, evaluators and humanitarians, with the support of the Harvard Humanitarian Initiative, UNOCHA, the MacArthur foundation and other generous donors.
KoBoToolbox was designed to make data collection reliable, and easy to use during humanitarian crises and other challenging conditions with limited connectivity. KoBoToolbox works on- and off-line, and using mobile phones, tablets, or computers, through apps or web-based interface.
KoBoToolbox offers simple ways to build complex forms and interview guides, collect information, visualize results, and export data. It also includes a library function to share and export standardized.
Created over 10 years ago, KoBoToolbox remains under active development with new features added regularly. KoBoToolbox is used around the world in every humanitarian crisis and for monitoring and evaluation, impact assessment or field research among others.
email us at usetech.go@gmail.com for more inquires
visit www.kobotoolbox.org
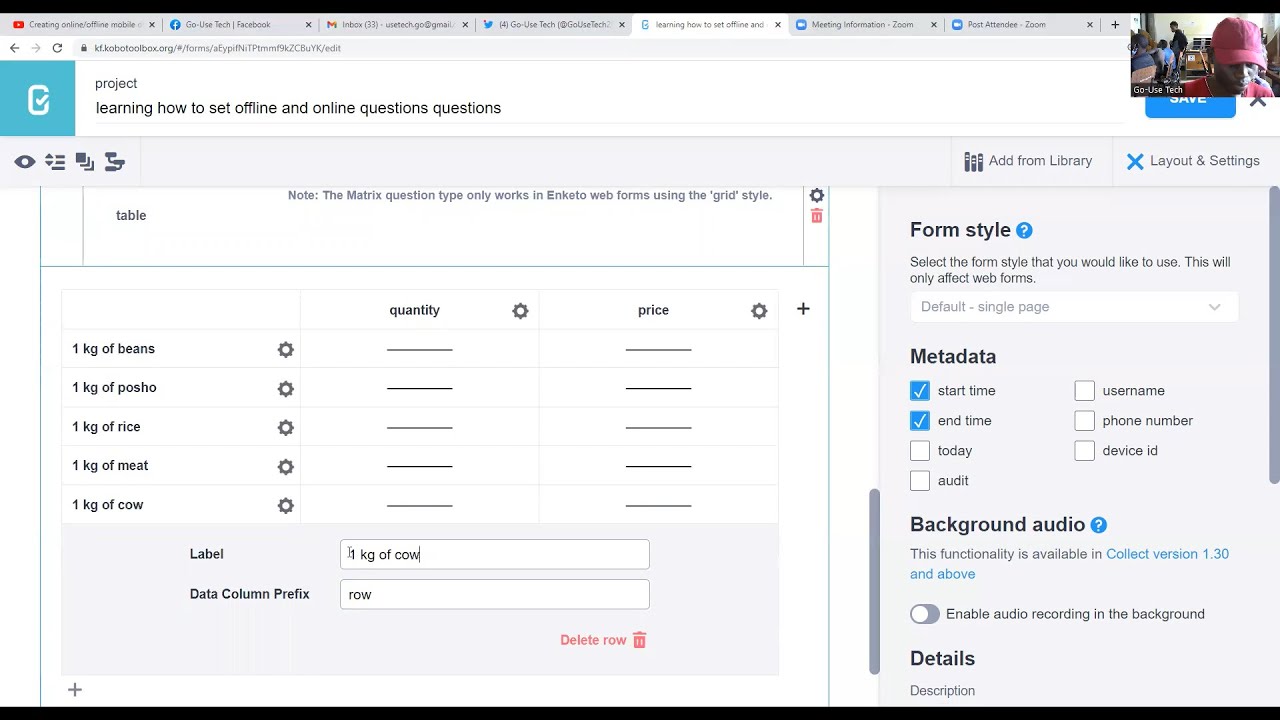
In this video, i will show you the easiest way to create a table in kobotoolbox
here are some steps taken to quickly design data collection questions using kobo tool box
please subscribe, like, share and comment for more videos
incase of any question remember to write to us
usetech.go@gmail.com

Hi all,
In this video you will learn the quickest way to fill the ugandan visa online form in just seconds
remember to subscribe to our channel

in this Tutorial Mr. Nabasa Jonathan clearly showed us how He thought of changing the world and this came up after he joined computer course with CTA windle international Uganda
► Keep in touch with us in Social Media :
________________________________________
Youtube channel: https://www.youtube.com/channel/UCEAl...
facebook: https://www.facebook.com/gousetech
Twitter: https://twitter.com/GoUseTech
Email: usetech.go@gmail.com
linkedin: https://www.linkedin.com/in/go-use-te...
whatsapp number:
+256 779-113-920
► If you get for more videos stay with me & subscribe my chanel
Subscribe: https://www.youtube.com/channel/UCEAl...

In this tutorial we shall guide you on how to add background audio recording and GPS in kobo tool box to help you get accurate data
for more details subscribe to our channel
youtube:https://www.youtube.com/channe....l/UCEAlDOqZwPpDLshDE
Facebook: https://www.facebook.com/gousetech
Twitter: https://twitter.com/GoUseTech2
Linkedin: https://www.linkedin.com/in/go-use-tech-0a871123b/
Whatsapp https://tebtalks.com/@1662457783922720
Whatsap: https://api.whatsapp.com/send/?phone=%2B256779113920&text&type=phone_number&app_absent=0
Email: usetech.go@gmail.com

In this tutorial we shall guide you on how to EASIEST WAY TO COMBINE / MERGE SEPERATE NAMES TOGETHER IN EXCEL (NEW TRICKS 2023)
FOR MORE RELATED VIDEOS PLEASE FOLLOW US ON OUR SOCIAL MEDIA PLATFORMS
YouTube: https://www.youtube.com/channe....l/UCEAlDOqZwPpDLshDE
Facebook: https://www.facebook.com/gousetech
Twitter: https://twitter.com/GoUseTech2
LinkedIn: https://www.linkedin.com/in/go-use-tech-0a871123b/
Tebtalks: https://tebtalks.com/@1662457783922720
Whatsap: https://api.whatsapp.com/send/?phone=%2B256779113920&text&type=phone_number&app_absent=0
Email: usetech.go@gmail.com
Thanks for the support
Regards
NABASA JONATHAN
FOUNDER GO-USE TECH
jnabasa135@gmail.com, +256 779113920

Plane mirror

In this tutorial we shall guide you on how to Reduce on Data errors using Validation Criteria in Kobotoolbox (NEW TRICKS 2023)
FOR MORE RELATED VIDEOS PLEASE FOLLOW US ON OUR SOCIAL MEDIA PLATFORMS
YouTube: https://www.youtube.com/channe....l/UCEAlDOqZwPpDLshDE
Facebook: https://www.facebook.com/gousetech
Twitter: https://twitter.com/GoUseTech2
LinkedIn: https://www.linkedin.com/in/go-use-tech-0a871123b/
Tebtalks: https://tebtalks.com/@1662457783922720
Whatsap: https://api.whatsapp.com/send/?phone=%2B256779113920&text&type=phone_number&app_absent=0
Email: usetech.go@gmail.com
Thanks for the support
Regards
NABASA JONATHAN
FOUNDER GO-USE TECH
jnabasa135@gmail.com, +256 779113920
In this tutorial we shall guide you on how to CREATING BUSINESS BARCODES IN EXCEL (NEW TRICKS 2023)
for more details subscribe to our channel
youtube:https://www.youtube.com/channe....l/UCEAlDOqZwPpDLshDE
Facebook: https://www.facebook.com/gousetech
Twitter: https://twitter.com/GoUseTech2
Linkedin: https://www.linkedin.com/in/go-use-tech-0a871123b/
Whatsapp https://tebtalks.com/@1662457783922720
Whatsap: https://api.whatsapp.com/send/?phone=%2B256779113920&text&type=phone_number&app_absent=0
Email: usetech.go@gmail.com

❤❤

In this tutorial, we took time to introduce tebtalks to the youths of kyangwali refugee settlement
we discussed many important things that could help them in the future
What you can expect to gain from this session:
Analyzing Data in Lists and Tables
Summary Based IF Functions
Chart Tools
Building and Working with Pivot Tables
Who this session is for: Data analysts, Excel users who need to analyze, manipulate and visualize data. Knowledge of Excel Introduction preferred.

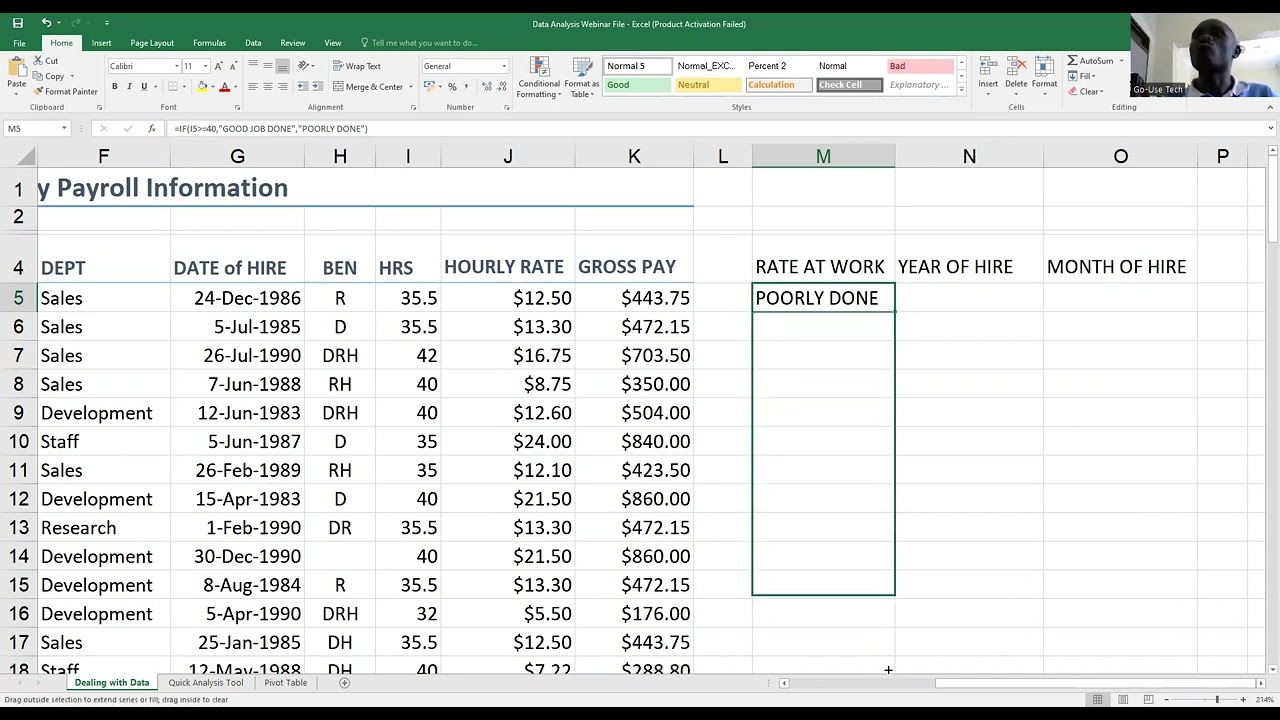
IN THIS TUTORIAL YOU WILL LEARN HOW TO DO Data Analysis using Excel (SUM IF FUCNTION)

a tool kit is a box that contains all the equipment that a computer technician needs when installing the computer components in the computer


RAM (pronounced ramm) is an acronym for random access memory, a type of computer memory that can be accessed randomly; that is, any byte of memory can be accessed without touching the preceding bytes.

This video was made on November 25 2017 the purpose of this video is to help one to customize the speed to his career computer running on windows 10
My YouTube Chanel is Johnson desktop support and you can reach me at this email jonasmunyarubibi @Gmail.Com

This video is meant to explain how to block emails coming from unwanted sources into your inbox


The windows firewall helps to control the amount of traffic coming from the internet to the computer ,blocks and unblock the information coming from external sources into your pc so it’s always advisable to have your firewall turned on and off.

In this video you will learn how to Explore the windows 7 interface

this video was generated by jonas on Dec, 4 2017 with the purpose of sharing the idea of how to use the windows restore point and you can subscribe freely on this channel to watch my free videos

This video is meant to help the users on how to increase on the amount of RAM which boost the performance of your computer

In this video it shows how to fix different windows error from the system recovery menu on windows 7 operating system this helps to fix most problems depending on the type of the error
Let’s keep our eyes tuned.


In this short video I want to show you how to configure the IP address on your network


Hello viewers learn how to edit your channels on tebtalks in just one click
for more subscribe to our channels
1. @Go-Use Tech
2. @Tebtalks
website tebtalks.com

In this video we shall see how best you can write proper notes for your students so that they can quickly understand your content

learn how you can import a video from any social media platform directly to your channel on tebtalks.com

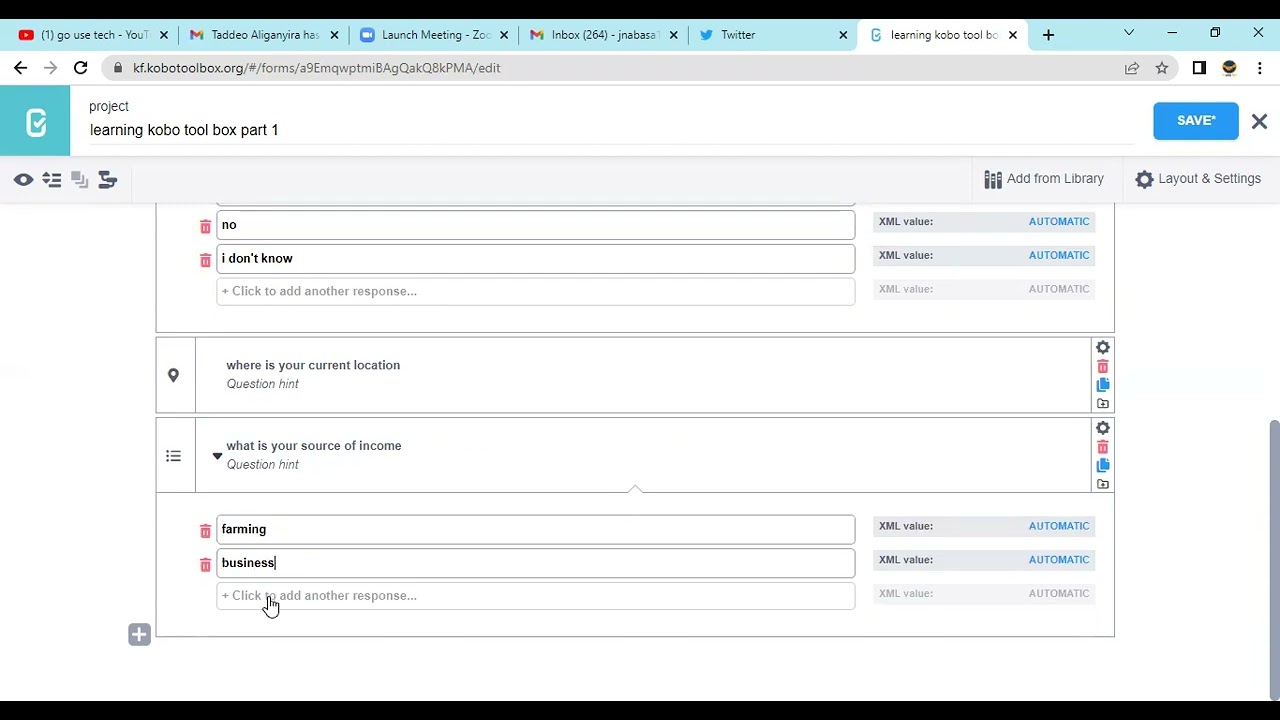
Do you use GROUPS of questions when designing your XLSForm, ODK, and KoBoToolbox forms?Groups are especially useful to use if you want to SKIP sections of the questionnaire based on who's filling out the form.For inquires kindly contact us on email: usetech.go@gmail.comLinkedIn: linkedin.com/in/go-use-tech-0a871123bTwitter: https://twitter.com/GoUseTech2 Facebook: go-use tech
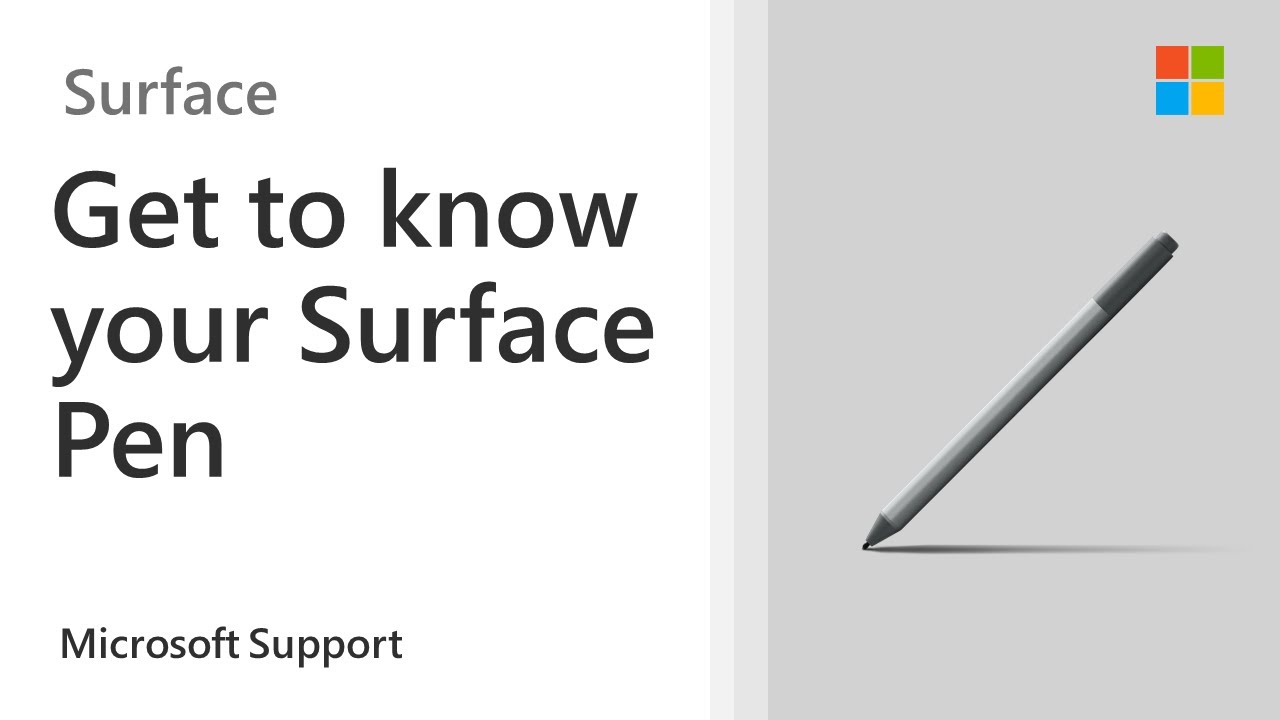
Get started using your Surface Pen as a mouse and keyboard. Learn how to use the pen to right click, turn your handwritten notes into typed text, edit the text, and much more.
0:00 Intro
0:22 Click and drag
0:40 Use pen to right click
2:00 Turn handwriting on screen into text
3:10 Tips to edit text
4:10 Launch keyboard option using the pen
If you want to
Click or select: Tap on an item.
Right-click: Press and hold the side button, then tap on the item.
Drag and drop: Place your pen on an item, and hold it there until the circle around the pointer completes. Then move the item to where you want it to go.
Select multiple items: Press and hold the side button, then drag your pen over the items you want to select.
Open Microsoft Whiteboard: Click the top button once.
Open Snip & Sketch: Double-click the top button.
Open Sticky Notes: Press and hold the top button.
Set up your Surface Pen: https://www.youtube.com/watch?v=cQ6otH6g1UM
How to draw or write in a Word doc with a digital pen: https://www.youtube.com/watch?v=gEmCISCIYoY
Check battery level of Surface device: https://www.youtube.com/watch?v=RPE_VT8V_fQ
Surface Pen not working: https://www.youtube.com/watch?v=RpvmTYjGujo
How to use your Surface Pen: https://support.microsoft.com/....en-us/help/4036281/h
How to change the battery in your Surface Pen with no clip: https://youtu.be/5A_iK_QrVwo
How to use your Surface Pen: https://youtu.be/4LiVX9jq8_U
Find out what kind of Surface Pen you have: https://support.microsoft.com/....en-us/help/4519767/i
How to use your Surface Pen: https://support.microsoft.com/....en-us/help/4036281/h
#SurfaceITseries
#SurfacePen

IN THIS VIDEO
i detailed the easiest ways we can create a playlist for our youtube videos

In this video we shall explain different steps, you can use to design kobo questioners in more than 100 languages
very simple and easy

Columbia University is a private Ivy League university in New York City and ranked #3 in National Universities and #7 in Best Global Universities. This prestigious New York Ivy League school is now quiet due to COVID. The famous Columbia University alumni include Barack Obama, Warren Buffet, and Jale Gyllenball.etc. The university will reopen in fall 2020, and 60% of undergraduate student can live in new york city campus.
*NOTE: Enjoy this Columbia University campus tour video in the best quality by setting the VIDEO QUALITY to the possible highest resolution!*
To subscribe: https://www.youtube.com/c/NYCs....cooting?sub_confirma
Columbia University is a prestigious Ivy League university in New York City. It was established in 1754 and is known for both its education and research. The average cost is around 79k including everything, a graduation rate of 95%, and an acceptance rate of 6%. With an old history comes political adversity. It recently took down a slaveowners name off a dorm. With Covid-19, many classes are held virtually. Very few students are on campus as seen in this video.
What GPA do you need to get into Columbia?
With such a small acceptance rate, the average GPA to qualify is above 4.0. It is extremely competitive at both the national and international levels.
What majors are popular at Columbia University?
Prominent programs include social science, engineering, computer, and information sciences and support services, biological and biomedical sciences, and psychology.
Is Columbia University worth the money?
Compared to similar colleges, it is relatively lower but still provides an excellent education.
What is Columbia University's endowment?
It is valued at around 10.9 billion dollars.
We hope you enjoy this Columbia University Campus tour as much as we do!
#ColumbiaUniversity #newyorkcolumbiauniversity #columbiauniverisitycampustour #newyorkcity

Meet Jonathan The CEO and Founder of Go-Use Tech explaining the background of #go-use tech, #photoshop #adobepremierepro #datacollection #kobotoolbox #odk #microsoft #word, #excel , #powerpoint

In this video i will show you how you can Import an XLSForm from your computer directly to your kobotoolbox account

Restream software and PTZ Optics camera hardware make live-streaming church services on Facebook and YouTube easy and high quality. In this tutorial I'll walk you through a setup that will allow your ministry to level up your live-streaming services even if you only have one volunteer.
Restream - Create Your FREE Account
https://restream.grsm.io/monte....weaver7397-10dollarc
——————————— DISCLAIMER ———————————
This channel is a participant in the Amazon Services LLC Associates Program, an affiliate advertising program designed to provide a means for sites to earn advertising fees by advertising and linking to www.amazon.com. By using the affiliate links, I earn a commission from qualifying purchases. This helps support my channel at no additional cost to you.
—————— HIGHLIGHTED IN THIS VIDEO ——————
PTZ Optics 20x USB - https://amzn.to/3m6inDj
HuddleCam Controller - https://amzn.to/39hB5CB
*New SuperJoy Controller - https://amzn.to/3rsjqOT
Acer Predator Computer - https://amzn.to/2PuJ08v
—————————— SUPPORT THE CHANNEL ——————————
•Patreon: Coming Soon!!
•My Wish List: https://www.amazon.com/hz/wish....list/ls/2LHJGVSY5AYQ
——————————— VIDEO GEAR ———————————
•Sony A6400: https://amzn.to/3NFVp2x
•Sigma 16mm Lens: https://amzn.to/375SRL6
•Sigma 30mm Lens: https://amzn.to/38K8lEX
•Sigma 18-50mm Lens: https://amzn.to/3vBW6mQ
•GoPro Hero 10: https://amzn.to/3xEGZKt
•ATEM Mini Video Switcher: https://amzn.to/3s3eB1G
•YoloBox Pro Video Switcher: https://amzn.to/3OT5cmU
•Elgato Streamdeck XL: https://amzn.to/3vzdwRi
•Glidegear Teleprompter: https://amzn.to/3s9WIy3
•Lilliput Monitor For Telepromter: https://amzn.to/3y9UuCG
•iFootage Motorized Slider: https://amzn.to/3LYyUFb
•DJI Mini 3 Pro Drone: https://amzn.to/39huDik
•Holystone HS720G 4K Drone: https://amzn.to/3Hh5VuN
•Hollyland Mars 400S Pro Wireless Video: https://amzn.to/39jNZDq
•Teradek Spark 4K Wireless Video: https://amzn.to/3mCEMsK
——————————— AUDIO GEAR ———————————
•Rodecaster Pro II: https://amzn.to/3NJeVLD
•Shure SM7B: https://amzn.to/3MzmYcE
•Shure MV7: https://amzn.to/3mCGfzp
•Sennheiser MKH 50: https://amzn.to/3aIgydS
•Rode VideoMic NTG: https://amzn.to/39eCkpo
•Rode Wireless Go II : https://amzn.to/3vAtHOc
•Canare XLR Audio Cables: https://amzn.to/3Qf0vo5
•Headphones - Shure AONIC 40 - https://amzn.to/3xENYDh
•Headphones - Shure AONIC 50 - https://amzn.to/3xkivoG
•Headphones - Shure InEar SE215 - https://amzn.to/3tu4mUx
————————————— LIGHTS —————————————
•Aputure 120D Mark II: https://amzn.to/3MNEWZa
•Aputure Light Dome II Softbox: https://amzn.to/3HfxCEw
•Neewer LED Studio Round Lighting: https://amzn.to/3xiRUrT
•Elgato Key Light Mini: https://amzn.to/3NKZQcG
•VILTROX LED Panel Light: https://amzn.to/39mWKfV
•YC Onion RGB Tube Light: https://amzn.to/3Qera4A
•Pixel G1 RGB Video Light: https://amzn.to/3aSziaU
————————— OTHER NOTABLE GEAR —————————
•Mac Mini: https://amzn.to/39menwm
•Mac Mini Stand: https://amzn.to/3mBP509
•Acer Predator Laptop: https://amzn.to/3xIf7VU
•Elgato Wave Arm LP: https://amzn.to/39pA9iF
•Samsung 49" Monitor: https://amzn.to/3mxTaCJ
•Ultrawide Monitor Arm: https://amzn.to/39dLxOC
•Autonomous 70" Standing Desk: https://amzn.to/3Hn3wio
•Elgato Master Mount: https://amzn.to/3Qgy5uc
•Elgato Green Screen: https://amzn.to/3mFwzUE
•SanDisk SD Cards: https://amzn.to/3tu0ZwQ
•iFootage Tripod: https://amzn.to/39eBxor
•iFootage Monopod: https://amzn.to/39hKMEm
•ATEM Mini Protective Cover: https://amzn.to/3L1uwnA
•Logitech Keyboard: https://amzn.to/3NMkYPx
•Logitech Mouse: https://amzn.to/3mB2FRD
———————————— SOFTWARE ————————————
•Uscreen - Grow Your Community ..... https://www.uscreen.tv/?via=monte
•TubeBuddy - Rank Your YouTube Videos ..... https://www.tubebuddy.com/monte
•Copy AI - Best AI Powered Copywriter ..... https://www.copy.ai/?via=monte
•Simple Texting - Text Message Marketing ..... https://bit.ly/simpletextingllc
•OtterAI - Best AI Powered Transcriber ..... https://bit.ly/otteraipower
•Epidemic Sound - Royalty Free Audio ..... https://bit.ly/epidemicaudiosound
•Envato PlaceIt - Mockup Designs ..... https://1.envato.market/c/1977837/629767/10168
——————— LIVE STREAMING SOFTWARE ———————
•Wirecast: https://telestream.8bx6ag.net/....c/2486727/319936/490
•Restream: https://restream.grsm.io/monteweaver7397
•Melon: http://melonapp.live
—————————— MY GEAR ——————————
•Gear For Sale: http://monteweaver.com/store
•Check out all my gear on Amazon: http://amazon.com/shop/monteweaver
———————— CONNECT WITH ME ————————
Website: https://monteweaver.com
Amazon: http://amazon.com/live/monteweaver
Instagram: http://instagram.com/monteweaver
Email: monte@valetmedia.agency
———————————————————————
#PTZOptics #LiveStreaming #restream

Enroll in "The Beginner's Guide to Live Streaming for Churches" Online Course - https://worshipministryschool.....com/live-streaming-c
Download the Worship Ministry Toolkit for a complete list of our recommended gear and software:
http://worshipministryschool.com/toolkit
In this video, you'll get and in-depth look at a live streaming setup for churches that uses the ATEM Mini Pro and ProPresenter for video switching and streaming.
Gear mentioned in this video:
Sony A6400 - https://amzn.to/2MbV6lg
Sony Lens 55-210 - https://amzn.to/3941m7v
Sony Lens 16-50 - https://amzn.to/3iyZU0d
ATEM Mini Pro - https://amzn.to/2Y1NN2i
Multiview Monitor - https://amzn.to/3o4DKUH
USB C Cable for ATEM - https://amzn.to/2XYVcPY
ProPresenter - https://renewedvision.com/propresenter/
ProPresenter Resi Stream Plugin - https://resi.io/blog/propresenter-stream-announcement/?utm_source=ChurchFront&utm_medium=Referral&utm_campaign=JakeGosselin
Check out Worship Ministry School:
https://worshipministryschool.com
Church Sound Course:
https://worshipministryschool.com/church-sound-course/
Beginner Live Streaming Course:
https://worshipministryschool.com/live-streaming-course
Advanced Live Streaming Course:
https://worshipministryschool.com/advanced-live-streaming
Broadcast Mix Mastery:
https://worshipministryschool.com/broadcast-mix-mastery
Download the Worship Ministry Toolkit for a complete list of our recommended gear and software:
http://worshipministryschool.com/toolkit
Follow Jake on Instagram: @jakegosselin
Follow Churchfront: @churchfront
FREE RESOURCES
Worship Leader Training:
https://worshipministryschool.com/free-training
Ambient Pads for Worship:
https://www.churchfrontpads.com/
Gear we use to make videos at Churchfront:
https://kit.co/churchfront/youtube-setup
• • • • •
Disclaimer: This video and description contain affiliate links.

A speed ramp can make your video look AWESOME. In this Basics Premiere Pro tutorial, I will tell you all about time remapping and show you step by step how to make a speed ramp. In the bonus part of this video, you will learn how to FREEZE and REVERSE footage!
We will also make the slow-motion more smooth with time interpolation - optical flow.
Speed-ramping is a must-know for every editor, but please make sure to avoid overuse of it.
In this tutorial I go over the simplest way to get started making titles in Adobe Premiere CC. Questions? Comment below!
The version I'm using in the video is CC 2015. I'm using the Essential Graphics and Type Tool,

in this video i managed to show you how quick you can use a calculator in kobotoolbox

How to create an account | upload videos| edit your profile| check your wallet balance with Tebtalks
In this video i will explain different ways you can create and account, edit your profile, check your wallet balance and so many things in tebtalks

Hello, in this tutorial am gonna show you all the steps you need to create both offline and online questioners using kobo tool box and ODK
it will also guide you how best you can collect your data with your computer without installing kobo on your phone

How to add links to your YouTube channel? In this tutorial, I show you how to add social media and website links to your YouTube channel art on PC & mobile phone. This can be a great way to get more followers on Twitter, Instagram, Facebook, Twitch, Mixer, Snapchat, TikTok or get more traffic to your blog / website. This feature was recently updated in 2022 on YouTube, changing the location of the settings. Let me know in the comments if you have any questions while you add links to your YouTube channel
Follow the steps below to add a social media link to your YouTube Channel page:
1. Copy the URL for the social media or website you want to add to your YouTube page.
2. Go to https://youtube.com and log in.
3. Select the avatar in the top right of YouTube, and in the menu, select Your Channel.
4. Once on your YouTube Channel page, select Customize Channel.
5. After selecting Customize Channel, select the Basic Info tab.
6. On the Basic Info tab, go the bottom and select the + Add Links button.
7. Paste your social media URL into the URL text field, then add the text for your title of your link. In my example I entered "Follow me on Instagram."
8. Add multiple social media links to your YouTube channel by repeating steps 6 through 7.
9. To save your links to your YouTube channel, select Publish.
10. You have now added a link to your social media profile on your YouTube channel page.

for every researcher before creating any question on kobo, you should have an account first. so today we are taking you through the steps needed to create an account with Kobo tool box

How to Design Election Campaign Poster Using Photoshop
Hi there!
In today's video, I have prepared a Photoshop Design Tutorial to show you, How to design a professional election campaign poster. You can use most of the techniques shown in this Photoshop tutorial and design a poster with Adobe Illustrator too. I hope you will get inspiration and get your hand dirty, and come up with your own set of Poster Designs.

How to Create a passport size photo in adobe Photoshop cc | Photoshop tutorialReally It's very simple for making your photo in passport size. you can make any photo in passport size photo by seeing this video. For getting related more tutorial video please stay with us & also SUBSCRIBE my channel.So i hope you learn something form this video and if you have any questions, feel free to ask me in comments below, till then good bye, take care.

Easy Way How to Remove Text from a Picture, image, logo, transparent text in Photoshop 2020 For Beginners, enjoy it
And please to share , like and subscribe , also remember to comment in case you don't understand something

In this Photoshop tutorial you will learn how to remove background in Photoshop with background eraser tool . Background eraser tool is the easiest way to remove any kind of background. The background eraser tool is the way to change any kind of toughest background so you should use this tool and one more thing friend this tool will help you to make your image destructive or non-destructive image. Photoshop: How To Cut Out an Image - Remove & Delete a Background

After adding a question, there are many different customizations you can make to it using the question options. In this video, I explained extensively how to use mandatory response in form

#go-use tech #Photoshop #Tutorial #MyDiaryBook
Hello Guys , Today we are going to learn how to blend, combine and merge two (2) layers together beautifully and nicely.
How to combine photos in Photoshop with Layer Masks, seamless blending technique
A quick 60 second tutorial explaining how to merge two layers in Adobe Photoshop Cc
Photoshop tutorial - understanding layer mask - merging two pictures into one | Photoshop tutorial
"PHOTOSHOP TUTORIAL" - Merging Two Images Using Layer Masks!
Steps to Follow:
1: You need 2 pictures to work with 1 background and 1 objective
2: Press: File - Open, and import your objective pic
3: Layer - Transparency - Add Alpha Channel
4: Select the Eraser tool
5: Lower it's spacing to about 2
6: And delete all the objective's background
7: Go to: File - Export As...
8: Change the extension to .png
9: And select PNG format (for transparency)
10: File - Close all - Discard
11: File - Open as Layers...
12: Select your background image
13: File - Open as Layers...
14: Select the PNG you saved earlier.
Photoshop Tutorial", CS6, "Layer Masks", Combining Images, Tutorial
"Photoshop Tutorial", CS6, "Layer Masks", Combining Images, Tutorial
"Photoshop Tutorial", CS6, "Layer Masks", Combining Images, Tutorial
